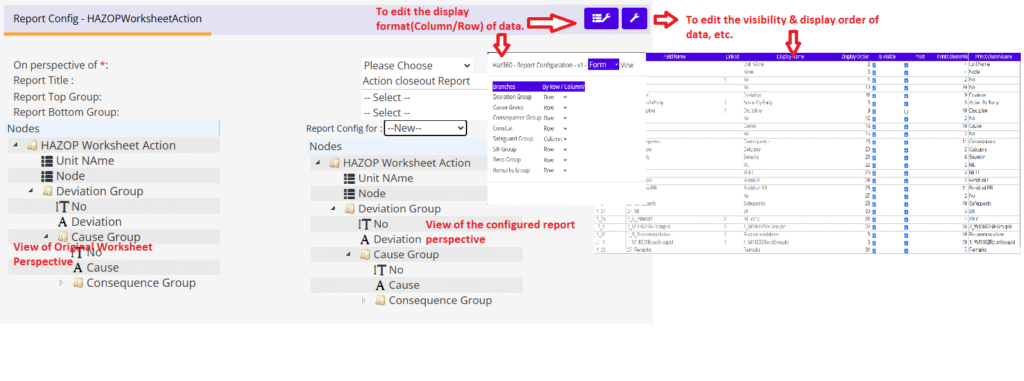
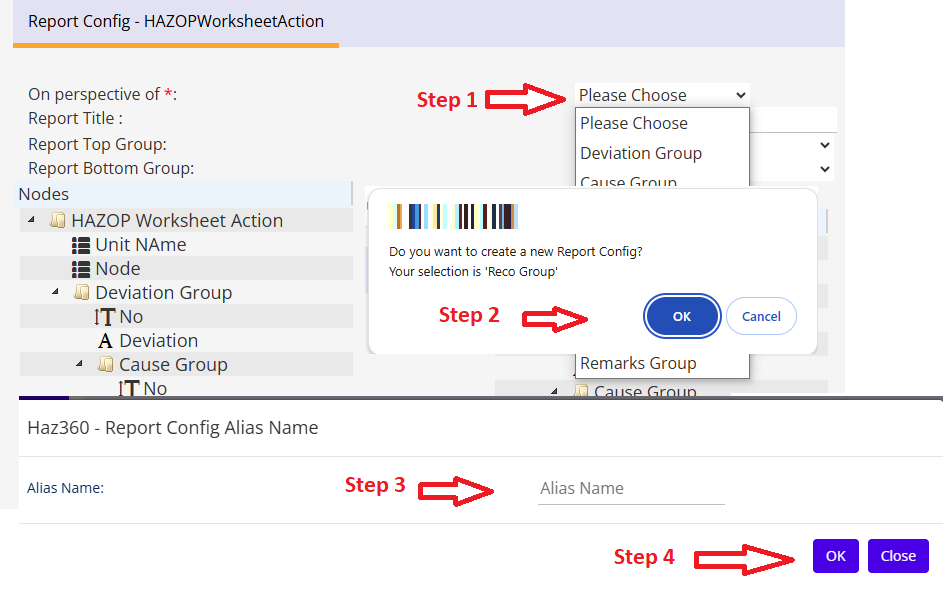
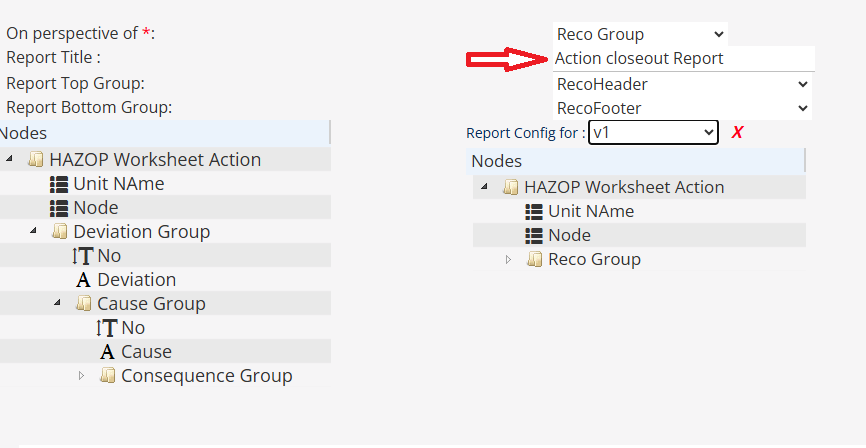
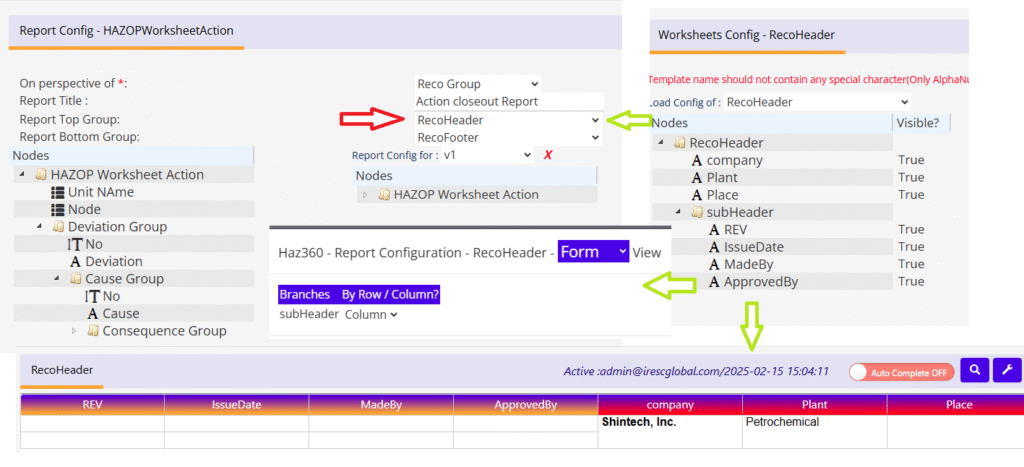
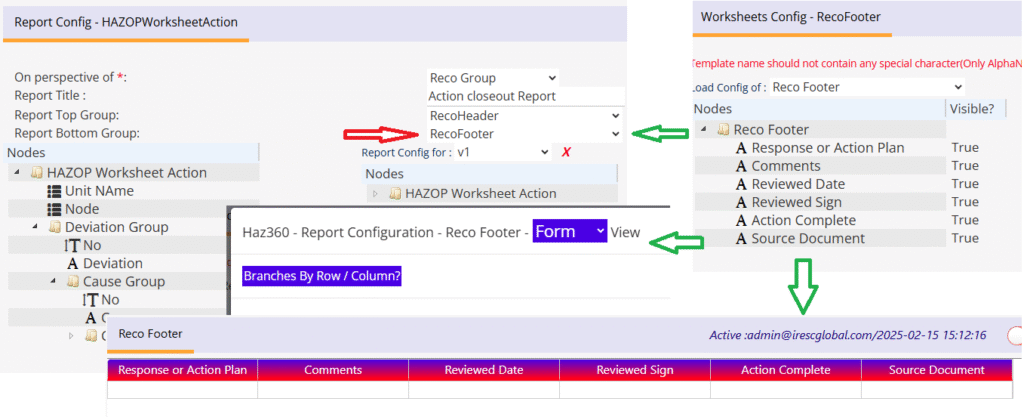
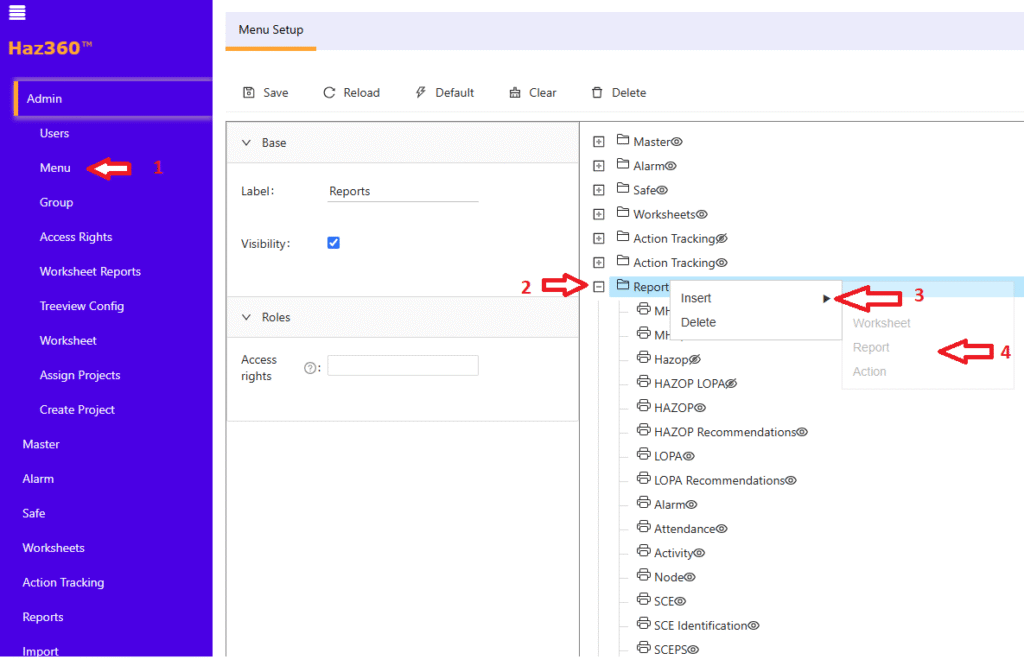
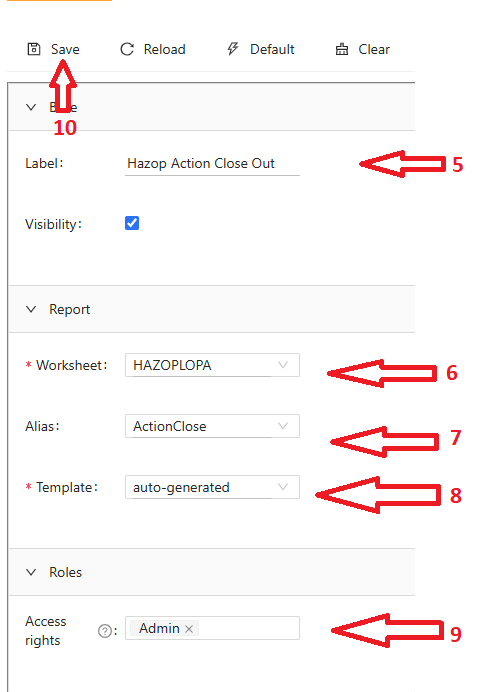
Report – Configuration STEPS – CREATING CONFIG FOR NEW REPORT User should follow below steps to setup report configuration in Haz360 worksheet(s). Go to print configuration using the icon(with printer & Spanner) in worksheet configuration screen.Screen like below will be displayed with configuration options. Note: Below example shows the Action closeout report configuration. Step 1: Select on which perspective the report is going to be & Name the configuration. Step 2: Provide the Title for this report if needed. Step 3: Select the Worksheet data to be displayed (static) on top of the report if needed. Step 4: Select the Worksheet data to be displayed (static) on bottom of the report if needed. Step 5: Click Spanner icon to change the Print Name, Filter option, Display order & visibility of your data if needed. Step 6: Click List with Spanner icon to change the Column/Row format of the data if needed. SAMPLE REPORT STEPS – FOR SETTING UP MENU Step 1: Select “Menu” from Haz360 Menus. Below page will be shown. Step 2: Click the “Report” option on the RHS.Step 3: Click the “Insert” from listed option.Step 4: Choose “Report” from the listed sub options. Step 5: Below screen options will be available on the LHS. Give name for the Report. Step 6: Select the worksheet for which you set-up the report configuration.Step 7: Select the name you gave for the report configuration.Step 8: Make sure the Template option is “auto-generated”.Step 9: Give access rights for this menu.Step 10: Save the Menu.